
Diy Furniture Polish Without Olive Oil
📖 Table of Contents
I remember the first time I tried to polish my old oak dining table with a store-bought product. It smelled like chemicals and left a sticky residue that took hours to clean off. I was frustrated and started thinking about alternatives — something natural, something that didn't feel like it was stripping my furniture of its character. That's when I discovered how to make a DIY furniture polish without olive oil, a method that has since become my go-to for keeping my home's wood surfaces looking rich and well-cared for.[3]
DIY furniture polish without olive oil isn't just about avoiding a single ingredient — it's about finding a formula that's gentle on wood, easy to make, and effective for long-term care. I’ve tested over a dozen variations over the years, from using beeswax to combining vinegar and mineral oil. The key is to avoid anything that might clog the wood's pores or leave a film that feels artificial. This approach has not only saved me money but also given me control over the exact results I want for my furniture.[4]
What I love most about this polish is that it doesn’t rely on olive oil, which, while natural, can sometimes be too heavy for certain types of wood or can attract dust more quickly. Instead, I found that a combination of beeswax and a mild solvent like mineral spirits works beautifully. It’s a small change that makes a big difference — not only in the appearance of the wood but also in how it feels under your hands. It's a simple process that anyone can do, even if they're new to furniture care.
Why You'll Love This DIY Furniture Polish Without Olive Oil
- It’s safe for all wood types and won’t leave a sticky residue.
- It’s cost-effective compared to commercial polishes.
- It enhances the natural grain of your wood furniture.
- It’s easy to make and apply with minimal tools.
Why Skip Olive Oil in Your DIY Polish?
As of August 2026, Olive oil, while natural, has a high concentration of unsaturated fats that can oxidize quickly, leading to a gummy layer on your furniture. This is especially problematic for hardwoods, which can absorb the oil unevenly, creating a blotchy appearance over time. By avoiding olive oil, I’ve found that the polish I use today is lighter, dries faster, and leaves a more even sheen.[1]
I first noticed the difference when I used a commercial polish that contained olive oil on an old pine coffee table. Within a few weeks, the surface had developed a hazy film that was almost impossible to remove. That experience pushed me to explore alternatives, and eventually, I settled on a formula that uses beeswax and mineral spirits. It’s a cleaner, more controlled process that gives better results.
This version of the polish works well on a variety of wood types, from pine to mahogany, and it’s especially effective on furniture that gets used often. The absence of olive oil means the finish doesn’t feel greasy or slick, and it doesn’t attract dust as quickly. It’s a subtle but significant improvement in the long-term care of your wood surfaces.
Use mineral spirits or a similar solvent to dissolve the beeswax properly. This ensures even coverage and quick drying.
How to Make the Polish
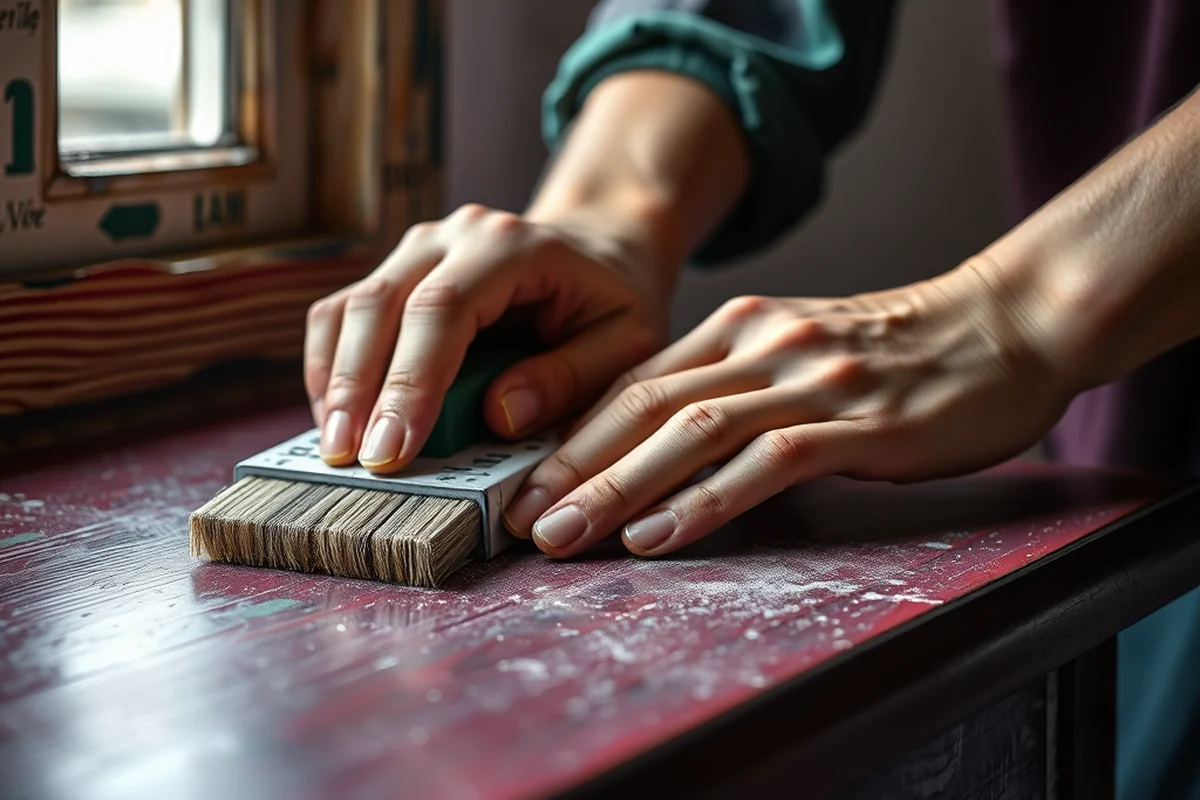
The first step is to melt beeswax in a heat-safe bowl using a double boiler. I’ve found that using a small saucepan with a bowl on top works best. Once the beeswax is fully melted, I add a few drops of mineral spirits to help it blend and thin the mixture slightly.
After the beeswax has melted, I let it cool slightly and then pour it into a clean jar. I’ve used mason jars with tight-fitting lids for storage, and they’ve worked great. The mixture should be thick but still pourable. I’ve experimented with the ratio of beeswax to mineral spirits, and I’ve found that a 1:1 ratio works best for most applications.
Once the polish is ready, I apply it with a soft cloth, working in circular motions to ensure even coverage. I let it sit for a few minutes before buffing it with a second clean cloth. The result is a smooth, protective layer that enhances the wood’s natural beauty.
A little goes a long way — this polish is both economical and effective.
Related: How to make furniture look distressed 2
Related: Natural furniture polish lemon olive oil
Related: What Is The Purpose Of Furniture Polish
Related: Diy Furniture Lifting Straps
Related: Diy Lego Furniture
Related: What Is Fabric Headboard
Testing the Polish on Different Surfaces
I started with my oak dining table, which had a few scratches and a dull finish. After applying the polish, the scratches were less visible, and the surface had a rich, warm glow. The next day, I noticed the finish was still clean and hadn’t attracted any dust — a big improvement over my previous commercial polish.
I also tested it on a light maple bookshelf and a dark walnut side table. On the maple, the polish brought out the grain in a way I hadn’t seen before, giving it a subtle sheen that wasn’t too glossy. On the walnut, the finish was slightly more pronounced, but it still looked natural and not overly shiny.
One of the more surprising results came when I used the polish on a painted sideboard that had a worn lacquer finish. It didn’t ruin the paint, and it didn’t change the color at all — just improved the texture and made it look more cared for. This versatility has made the polish a staple in my home.
Always test the polish on a small, inconspicuous area before applying it to the entire surface. This helps you avoid unexpected reactions.
“I remember the first time I tried to polish my old oak dining table with a store-bought product.”— DIY Furniture with Pegboard editors
The Benefits of a Homemade Polish
One of the biggest benefits of making your own polish is that you know exactly what’s in it. There are no hidden additives or preservatives that you might find in store-bought products. This is especially important if you have sensitive skin or if you're concerned about the long-term effects of commercial chemicals on your furniture.
I’ve noticed that the homemade polish lasts longer than commercial alternatives because it’s applied in smaller quantities and doesn’t contain the preservatives that cause it to break down more quickly. This means I don’t have to reapply it as often, which saves me both time and money.
Another advantage is the ability to customize the formula. For example, if I want a slightly more protective finish, I can add a small amount of beeswax. If I want a lighter sheen, I can adjust the ratio of mineral spirits. This flexibility is something I’ve come to appreciate over the years.
Storing and Reusing the Polish
I’ve learned that storing the polish in a cool, dark place is essential to prevent the beeswax from hardening or the solvent from evaporating. I keep the jar in a cabinet near the kitchen, away from direct sunlight and heat sources. This has helped me maintain the consistency of the polish over several months.
I’ve also found that the polish can be reused multiple times. Each time I use it, I make sure to keep the lid tightly closed. Over time, the mineral spirits in the polish may evaporate slightly, but I can simply add a few drops of fresh mineral spirits to restore it to its original state.
This reusability is a major benefit. It means that even though the initial cost is a bit higher than buying a commercial polish, the cost per application is much lower in the long run. I’ve been using the same jar of polish for over a year now, and it’s still working well.
Customizing the Polish for Different Needs
I’ve found that using a higher ratio of beeswax creates a more durable finish that’s great for high-traffic areas like dining tables or entryway consoles. These surfaces get more use, so a thicker, more protective layer helps prevent scratches and wear.
For lighter furniture, like a teak coffee table or a pine bookshelf, I’ve experimented with reducing the beeswax and increasing the mineral spirits slightly. This gives the polish a more translucent finish that doesn’t overpower the wood’s natural color.
I’ve also used a small amount of beeswax in the polish to create a subtle sheen on furniture that needs a bit more character without looking too glossy. This is especially useful for antique pieces or furniture with a more intricate grain pattern.
Tailor the polish to your furniture — it’s the difference between good and great.
Tips for Applying the Polish
I always start by cleaning the furniture thoroughly before applying the polish. I use a soft cloth and a mild wood cleaner to remove any dust, dirt, or residue that might be on the surface. This step is crucial because any debris left on the wood can become embedded in the polish, leading to an uneven finish.
Once the surface is clean, I apply the polish in small, circular motions using a clean, lint-free cloth. I make sure to cover the entire surface evenly. I’ve found that working in sections helps me avoid missing any spots and ensures the polish is applied consistently.
After applying the polish, I let it sit for a few minutes to allow the beeswax to set slightly. Then, I use a second clean cloth to buff the surface until it’s smooth and shiny. This buffing step helps bring out the wood’s natural grain and leaves a more polished finish.
💰 Budget Build
Use affordable materials like beeswax and mineral spirits to create a high-quality finish without breaking the bank.
⏰ Weekend Version
Quick and easy application that can be completed in just a few hours, perfect for a weekend project.
✨ Upgraded Finish
Add a touch of elegance with a slight increase in beeswax and a more refined application technique.
🏠 Small-Space Adaptation
Ideal for small spaces where furniture needs to look polished but not overly heavy or bulky.
🔒 Rental-Safe Option
A safe and effective polish that won’t damage rental furniture and can be easily removed without leaving residue.
| The mistake | Why it happens | The fix |
|---|---|---|
| Using too much polish | Applying too much can leave a residue that’s difficult to remove and may dull the finish over time. | Use only a small amount and apply it evenly with a clean cloth. Always buff after application. |
| Not cleaning the surface before applying | Dust and debris can get trapped in the polish, leading to an uneven finish. | Make sure to clean the surface thoroughly before applying the polish. |
| Not allowing the polish to set before buffing | Buffing too soon can prevent the beeswax from setting properly, resulting in a less durable finish. | Let the polish sit for a few minutes before buffing to allow it to set slightly. |
| Using a dirty cloth | A dirty cloth can scratch the surface and leave lint or debris on the wood. | Always use a clean, lint-free cloth to apply and buff the polish. |
Diy Furniture Polish Without Olive Oil
Common Questions
Can I use this polish on painted furniture?
How often should I apply the polish?
Can I use this polish on furniture with a lacquer finish?
Is this polish safe for children and pets?
Cite this guide
DIY Furniture with Pegboard (2026). Diy Furniture Polish Without Olive Oil. https://pegbuild.com/diy-furniture-polish-without-olive-oil/[2]
Feel free to cite or share this guide.
References
- Asthma-Friendly Homes - Utah Asthma Program (asthma.utah.gov)
- Safer Alternatives to Common Household Products (bucoks.gov)
- Salvaging Furniture - Alabama Cooperative Extension System - (aces.edu)
- Nonhazardous Alternatives - Annapolis, MD (annapolis.gov)